Appshell Domain: The appshell custom domain will let your app users to install the app on their mobile devices using this link. Please follow the steps below to integrate appshell custom domain.
Step 1: To integrate your existing domain into your Beezer app, click on the appshell custom domain option under the Build section of your Beezer dashboard.
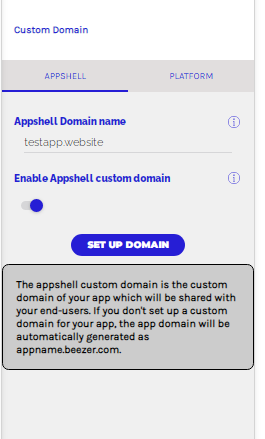
Step 2: Once you click on the appshell custom domain option, specify your domain name under the domain name option and switch on “Enable appshell custom domain” slider button.
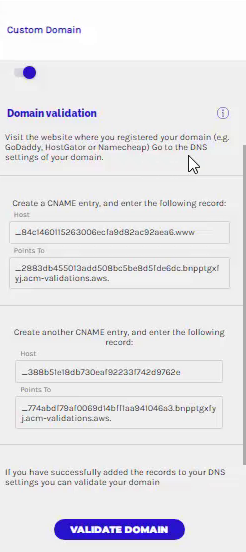
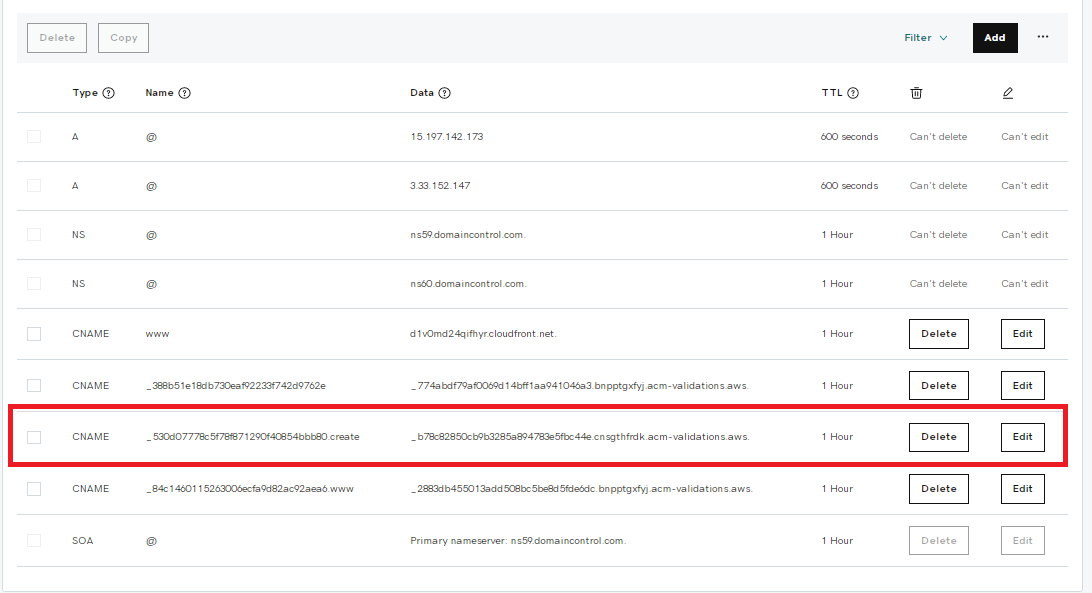
Step 3: The Domain Validation settings will appear after enabling appshell custom domain option, copy and paste the CNAME records to the DNS settings on your existing domain provider dashboard. You can click on manage DNS settings for the domain (as shown in the below screenshot for GoDaddy) or take assistance from your domain provider. Once the entries are added, navigate to your Beezer dashboard and click on Validate Domain option. If the validation fails, wait for 15mins and try again, as some domain providers take time to update the records at their end.
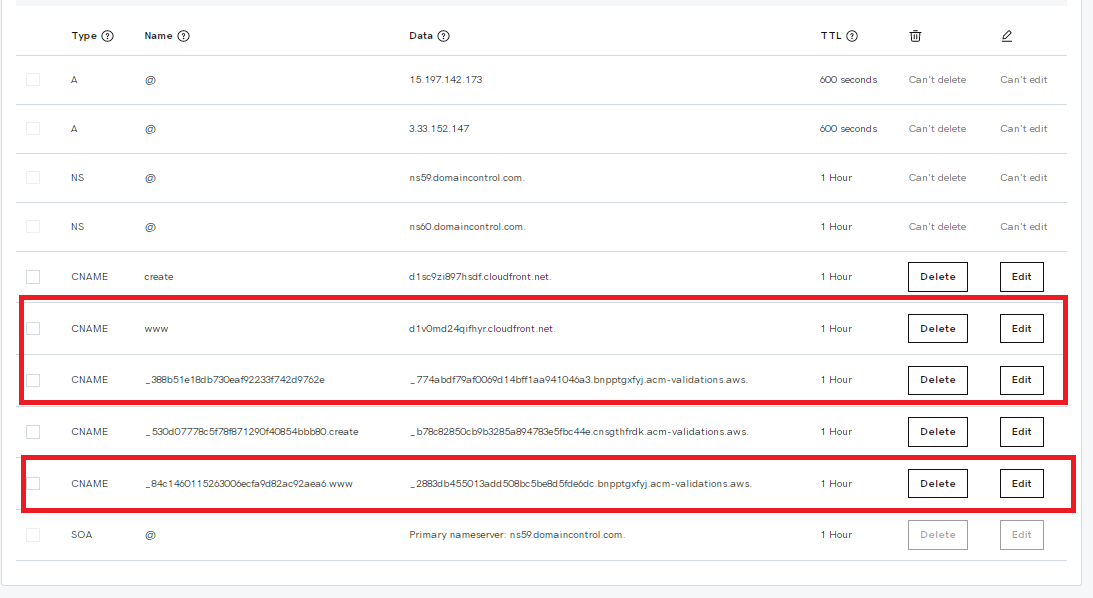
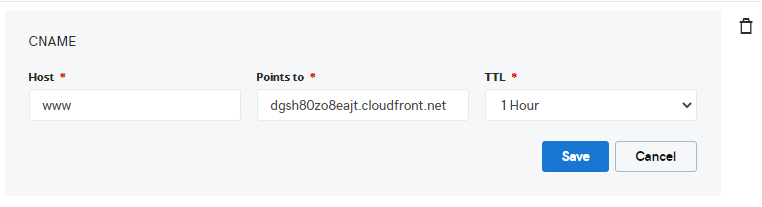
Step 4: Once the validation is complete, navigate to the DNS settings of your domain provider and create a new CNAME entry. Now, set the Host to WWW. and point it to CloudFront address (xxxxxxxxxxxxxxxx.cloudfront.net). If you are using sub-domain there will be different subdomain host and CloudFront address.
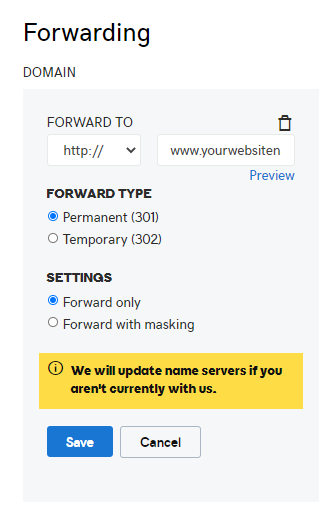
Step 5: Once the CNAME record is updated, navigate to Forwarding and select the settings "forward only", the forward type "Permanent (301)" and forward it to http://www.yourwebsitename.com. This option will not be visible if you are using a sub-domain for ex. https://www.app.yourwebsitename.com, in this case you will just need to enter the cloudfront address and publish the app.

Platform Domain: The platform custom domain can be used by the app admins of your app to login to the Beezer dashboard and publish changes to their respective apps. Please follow the steps below to integrate platform custom domain.
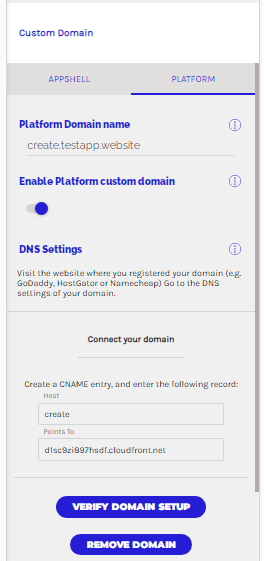
Step 1: To integrate your platform domain, click on the platform custom domain option under the Build section of your Beezer dashboard.
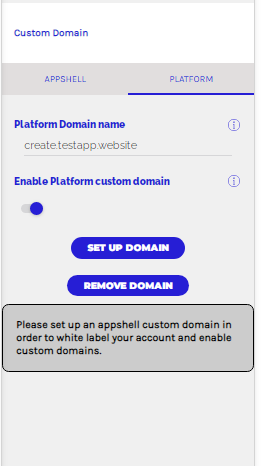
Step 2: Once you click on the platform custom domain option, specify the domain name under the platform domain name option and switch on “Enable platform custom domain” slider button. You will share this link with your app admins once the setup is complete so the admins are able to login to the dashboard and edit the app.
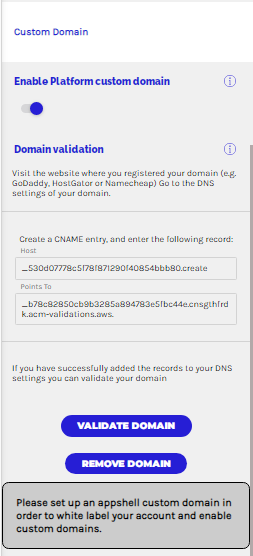
Step 3: The Domain Validation settings will appear after enabling platform custom domain option, copy and paste the CNAME records to the DNS settings on your existing domain provider dashboard. You can follow the same steps provided for step 3 appshell custom domain configuration.
Step 4: Once the validation is complete, navigate to the DNS settings of your domain provider and create a new CNAME entry. Now, set the Host to Login. and point it to CloudFront address (xxxxxxxxxxxxxxxx.cloudfront.net).
Step 5: You can now publish the app and share the platform link directly with your app admins. App admins can further use this link to login to the dashboard and make changes to the app without seeing any Beezer branding.

Shortcuts for some of the top domain providers:
Note: After these settings are updated, the changes may take some time to reflect depending upon the time specified by your domain provider.